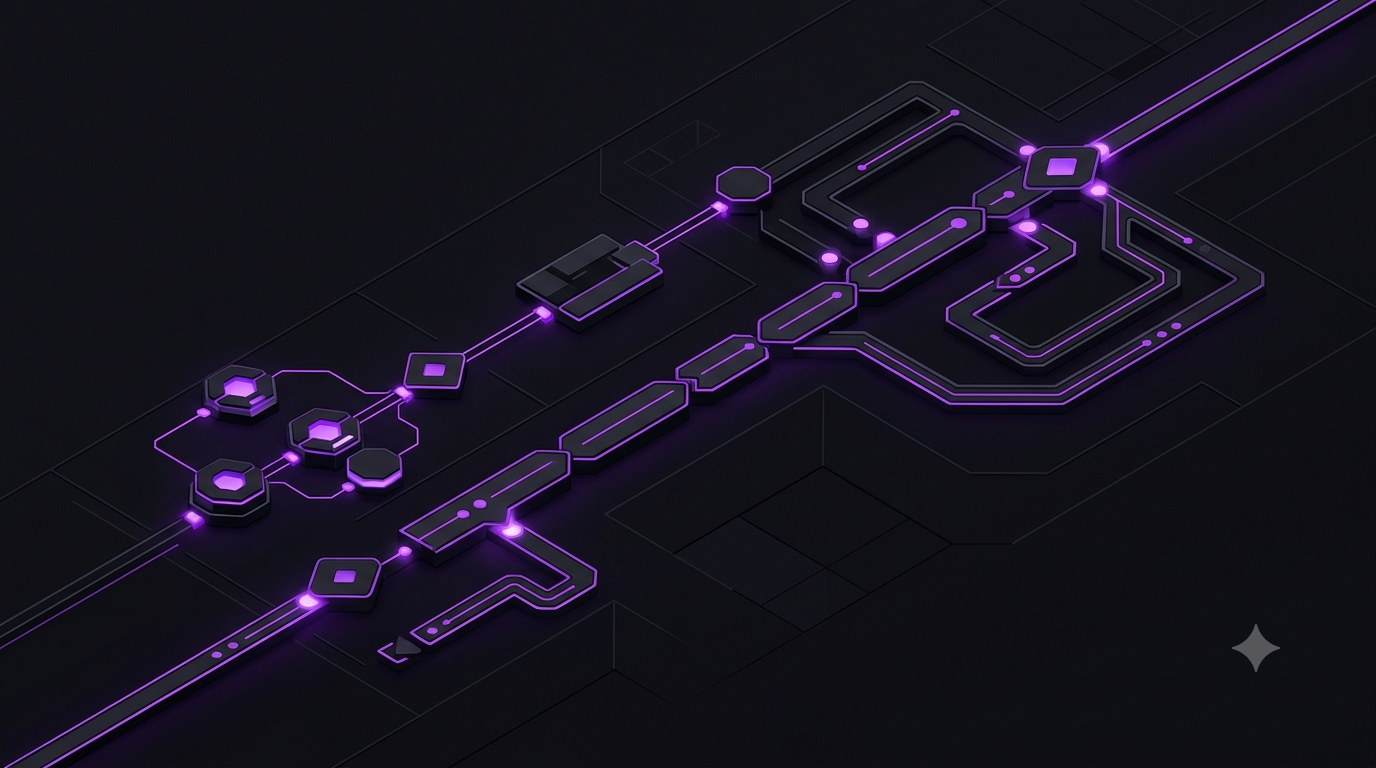
n8n for Beginners: Everything You Need to Know to Get Started in 2026
n8n for Beginners: Everything You Need to Know to Get Started in 2026
Workflow automation has become one of the most valuable skills for founders, operators, marketers, and small business owners. Instead of spending hours each week copying data between apps, sending repetitive emails, updating spreadsheets, or responding to routine events, you can build workflows that perform those tasks automatically.
Among the many automation platforms available today, n8n has become one of the fastest-growing choices. Unlike many traditional automation tools, n8n combines a visual workflow builder with powerful customization options, allowing you to automate both simple and highly complex business processes.
You don't need to be a professional developer to start using it. Many workflows can be built entirely with drag-and-drop nodes, while more advanced users can extend those workflows using JavaScript, APIs, databases, and AI services.
Whether you're running an ecommerce store, building a SaaS company, managing marketing campaigns, or simply trying to reduce repetitive work, learning n8n can save hundreds of hours every year.
This guide explains everything you need to know to get started in 2026. By the end, you'll understand the core concepts behind n8n, know which deployment option is right for you, install your own instance, and be ready to build your first automation.
What Is n8n?
n8n is an open workflow automation platform that connects the software you already use.
Think of it as a control center for your business applications.
Instead of manually moving information between Gmail, Slack, Notion, Google Sheets, Shopify, HubSpot, OpenAI, and hundreds of other services, n8n allows those applications to communicate automatically.
A workflow might look like this:
- A customer submits a form.
- n8n receives the submission.
- The contact is added to your CRM.
- A Slack notification is sent.
- An email sequence begins.
- A Google Sheet is updated.
All of this can happen in seconds without anyone touching a keyboard.
Because n8n supports hundreds of integrations and custom HTTP requests, it can automate almost any repetitive digital process.
Why Learn n8n?
Automation isn't just about saving time. It's about building systems that continue working even when you're focused on other priorities.
Learning n8n gives you the ability to:
- Reduce repetitive manual work.
- Connect software that doesn't integrate directly.
- Build AI-powered workflows.
- Create internal business tools.
- Improve operational consistency.
- Scale processes without hiring additional staff.
For founders and small teams, these improvements often translate directly into lower operating costs and faster execution.
Unlike platforms that focus only on simple automations, n8n can grow alongside your business. A workflow that begins as a simple email notification can eventually evolve into a complete customer onboarding system or AI-powered operations pipeline.
n8n Concepts Explained Simply
Before building workflows, it's important to understand a few core concepts. These ideas appear throughout the platform and form the foundation of every automation.
Nodes
A node is a single step in a workflow.
Every workflow is made up of nodes connected together.
Some nodes receive information.
Others process it.
Others send it somewhere else.
Imagine an assembly line in a factory.
Each worker performs one specific job before passing the product to the next worker.
Nodes work the same way.
For example:
- A Gmail node receives a new email.
- An OpenAI node summarizes the email.
- A Slack node sends the summary.
Each node has one responsibility.
When connected together, they create a complete workflow.
Types of Nodes
Most workflows include several different categories of nodes.
- Trigger nodes start workflows.
- Action nodes perform work.
- Logic nodes make decisions.
- Data nodes transform information.
Understanding these categories makes workflow design much easier.
Workflows
A workflow is simply a collection of connected nodes.
It defines the sequence of events that should happen after a trigger occurs.
For example:
- Someone submits a contact form.
- The workflow starts.
- The data is validated.
- The lead is enriched.
- The CRM is updated.
- The sales team receives a notification.
You can think of a workflow as a digital employee that follows the same instructions every time.
Once activated, it repeats the process automatically without forgetting steps or making copy-and-paste mistakes.
Triggers
Every workflow needs something that tells it when to begin.
This starting event is called a trigger.
Common triggers include:
- A new email arrives.
- A webhook receives data.
- A customer places an order.
- A scheduled time is reached.
- A row is added to Google Sheets.
- A new file appears in Google Drive.
Without a trigger, the workflow never starts.
Actions
After a trigger starts the workflow, action nodes perform useful work.
Examples include:
- Send an email.
- Create a CRM contact.
- Update a spreadsheet.
- Generate AI content.
- Upload a file.
- Call an API.
Most workflows contain several actions connected together.
Credentials
Most services require authentication before allowing another application to access data.
In n8n, these authentication details are stored as credentials.
Instead of entering your API key or login information every time you build a workflow, you create the credential once and reuse it whenever needed.
Examples include:
- Google OAuth credentials.
- OpenAI API keys.
- Slack authentication.
- Shopify API credentials.
- HubSpot access tokens.
Credentials are encrypted and stored separately from your workflow logic, making management much simpler.
Executions
An execution is a single run of a workflow.
Every time a trigger activates, n8n creates a new execution.
For example:
- One new email arrives.
- One workflow execution begins.
- The workflow completes.
If five emails arrive, five separate executions occur.
The execution history lets you:
- View inputs.
- Inspect outputs.
- Debug failures.
- Measure runtime.
- Identify errors.
This debugging capability is one of n8n's biggest strengths because you can inspect every step individually.
Self-Hosted vs n8n Cloud
One of the first decisions you'll make is how you want to run n8n.
You have two options:
- n8n Cloud
- Self-hosted n8n
Both use the same workflow editor, but they differ in deployment, maintenance, and operational responsibility.
n8n Cloud
With n8n Cloud, the platform is managed for you.
You create an account, log in through your browser, and begin building workflows immediately.
The n8n team handles:
- Hosting.
- Updates.
- Backups.
- Infrastructure maintenance.
- Security patches.
This option is ideal if you want to focus on automation rather than server administration.
Advantages include:
- Fast setup.
- No server management.
- Automatic updates.
- Reliable infrastructure.
The trade-off is recurring subscription costs and less control over the underlying environment.
Self-Hosted n8n
Self-hosting means you run n8n on your own infrastructure.
This could be:
- A VPS.
- A dedicated server.
- A Raspberry Pi.
- A local computer.
- A cloud virtual machine.
You are responsible for:
- Installing updates.
- Managing backups.
- Monitoring uptime.
- Securing the server.
In return, you gain complete control over your deployment and often lower long-term operating costs, particularly for high-volume workflows.
Which One Should You Choose?
Choose n8n Cloud if:
- You are completely new to automation.
- You want the quickest setup.
- You don't want to manage servers.
- You prefer a managed service.
Choose self-hosted n8n if:
- You want full control.
- You expect large workflow volumes.
- You already manage servers.
- You need custom infrastructure.
Many users begin with n8n Cloud to learn the platform and later migrate to self-hosting as their automation needs grow.
Installing n8n with Docker
If you decide to self-host, Docker is the recommended installation method. Docker packages the application and its dependencies into a container, making installation and future updates much simpler than configuring every component manually.
Before starting, make sure Docker and Docker Compose are already installed on your server or computer.
Create a directory for n8n:
mkdir n8nMove into that directory:
cd n8nCreate a Docker volume for persistent data:
docker volume create n8n_dataStart the official n8n container:
docker run -it --rm \
--name n8n \
-p 5678:5678 \
-v n8n_data:/home/node/.n8n \
docker.n8n.io/n8nio/n8n
Once the container starts successfully, open your browser and navigate to:
http://localhost:5678If you're installing on a remote server, replace localhost with your server's IP address or domain name.
The first launch will guide you through creating your administrator account before taking you to the workflow editor.
At this point, your n8n instance is fully operational and ready for building workflows.
In the next section of this guide, you'll build your first automation step by step, learn the most useful beginner nodes, and discover workflow templates that can dramatically accelerate your learning.
Your First Workflow: Send a Slack Notification When You Receive a Gmail Email
The best way to learn n8n is by building something useful.
In this section, you'll create a simple workflow that watches your Gmail inbox. Whenever a new email arrives, n8n will automatically send a notification to a Slack channel.
This workflow introduces several concepts you'll use repeatedly:
- Creating a workflow
- Adding nodes
- Connecting credentials
- Testing nodes individually
- Passing data between nodes
- Activating a workflow
By the end, you'll understand the basic workflow-building process that applies to almost every automation you create.
Step 1: Create a New Workflow
After logging into n8n, you'll arrive at the workflow dashboard.
Click Create Workflow.
An empty canvas appears. Think of this as your workspace. Every node you add will appear here.
Save the workflow immediately by clicking its title and giving it a descriptive name, such as:
- Gmail → Slack Notification
Using descriptive names becomes increasingly important as your collection of workflows grows.
Step 2: Add the Gmail Trigger
Click the large + button in the center of the canvas.
The node picker opens.
Search for:
- Gmail Trigger
Select it.
The Gmail Trigger node becomes the first node in your workflow.
This node starts the workflow whenever a new email matching your conditions arrives.
Step 3: Connect Your Gmail Account
The node now requests credentials.
Click:
- Create New Credential
You'll be guided through Google's OAuth authentication process.
Log into the Gmail account you want n8n to monitor.
Grant the requested permissions.
Once complete, the credential is saved and can be reused in future workflows.
You won't need to authenticate again unless the credentials expire or are revoked.
Step 4: Configure the Trigger
The Gmail Trigger offers several options.
For your first workflow, leave most settings at their defaults.
You can optionally configure filters such as:
- Specific labels
- Unread emails only
- Emails from certain senders
- Subject contains specific text
Keeping the trigger simple makes testing easier.
Step 5: Test the Trigger
Click Test Step.
n8n begins listening for new emails.
Open another email account and send yourself a test message.
After the email arrives, return to n8n.
You should now see the email information appear inside the node output.
This output contains fields such as:
- Sender
- Recipient
- Subject
- Email body
- Date
Every downstream node will have access to this information.
Step 6: Add the Slack Node
Click the small + button to the right of the Gmail node.
Search for:
- Slack
Select the Slack node.
Connect it to the Gmail Trigger.
Your workflow now contains:
- Gmail Trigger → Slack
Step 7: Connect Slack
Create a new Slack credential.
Authorize your Slack workspace.
Select the channel where notifications should appear.
This might be:
- #general
- #sales
- #support
- #notifications
Step 8: Configure the Message
Inside the Slack node, choose the operation that sends a message.
Now build your notification.
Instead of typing static text, insert data from the Gmail Trigger.
For example:
New Email Received

From: {{Sender}}

Subject: {{Subject}}

Received: {{Date}}
As you build more workflows, you'll learn to insert dynamic expressions from previous nodes.
Step 9: Test the Workflow
Click Execute Workflow.
Send yourself another email.
If everything is configured correctly:
- Gmail detects the email.
- The workflow begins.
- Slack receives the notification.
Congratulations—you've built your first automation.
Step 10: Activate the Workflow
Testing only runs the workflow temporarily.
To keep it running automatically, click:
- Activate
The workflow now waits continuously for future emails.
No additional action is required.
This same process applies to almost every automation you'll build in n8n:
- A trigger starts the workflow.
- Data flows through multiple nodes.
- Actions happen automatically.
The 10 Most Useful n8n Nodes for Beginners
n8n includes hundreds of integrations, but beginners don't need to learn all of them at once.
The following ten nodes appear in thousands of workflows and provide an excellent foundation.
1. Manual Trigger
The Manual Trigger starts workflows only when you click the execute button.
It's ideal while learning because it allows you to test workflows without waiting for real events.
2. Schedule Trigger
The Schedule Trigger runs workflows automatically at specific times.
Examples include:
- Every hour
- Every morning
- Every Monday
- The first day of each month
This node powers reports, backups, reminders, and recurring automations.
3. Webhook
The Webhook node allows other applications to start your workflow.
Many websites, forms, and SaaS platforms send data using webhooks.
If you've ever submitted an online form, a webhook may have been involved behind the scenes.
4. HTTP Request
This is arguably the most powerful node in n8n.
Whenever an application has an API but no dedicated integration, the HTTP Request node usually fills the gap.
Learning this node dramatically expands what you can automate.
5. IF
The IF node introduces decision making.
Examples include:
- If amount is greater than $500...
- If email contains "Support"...
- If customer is premium...
Different branches execute depending on the result.
6. Switch
Switch works like IF but supports many possible outcomes.
For example:
- Sales
- Support
- Marketing
- Finance
Each category follows its own path.
7. Set
The Set node creates or modifies data.
It's frequently used to:
- Rename fields
- Add new values
- Simplify outputs
- Prepare information for another application
8. Code
The Code node allows custom JavaScript.
Although optional for beginners, it's extremely useful once you become comfortable with workflow logic.
Many advanced automations rely on this node.
9. Google Sheets
Google Sheets remains one of the most common destinations for workflow data.
You can:
- Add rows
- Update records
- Read spreadsheets
- Generate reports
10. OpenAI
AI has become a central part of automation.
The OpenAI node makes it easy to:
- Summarize text
- Generate emails
- Extract structured data
- Classify documents
- Create content
Many of today's most valuable workflows combine traditional automation with AI-powered decision making.
Where to Find Workflow Templates
You don't have to build every workflow from scratch.
Starting from an existing template is often the fastest way to learn how workflows are structured.
Templates also help you understand best practices and common design patterns.
Some of the best places to find templates include:
- The official n8n template library
- The n8n community forum
- GitHub repositories
- Educational YouTube channels
- Flowshed's curated workflow library
Flowshed focuses on production-ready workflows designed for founders, operators, agencies, ecommerce businesses, and AI-powered startups.
Instead of spending hours building common automations from scratch, you can import a workflow, configure your credentials, and customize it to match your business.
Common Beginner Mistakes
Everyone makes mistakes while learning n8n.
The good news is that most are easy to avoid.
Not Testing Nodes Individually
Test each node before adding another.
If something breaks, you'll immediately know where the problem started.
Ignoring Execution History
The execution log is your best debugging tool.
Whenever something doesn't work, inspect each node's input and output before changing the workflow.
Hardcoding Values
Beginners often type fixed values instead of using expressions.
Dynamic expressions make workflows reusable and much more flexible.
Forgetting Error Handling
External services occasionally fail.
Design workflows that can recover gracefully instead of stopping completely after one error.
Building Massive Workflows Too Early
Start small.
Build simple automations first.
Once you're comfortable with the fundamentals, combine them into larger systems.
Not Naming Nodes Clearly
Instead of leaving names like "HTTP Request 3," rename nodes based on their purpose.
Examples:
- Fetch Customer
- Create Invoice
- Generate AI Summary
Future you will appreciate the extra clarity.
Resources to Keep Learning
One of n8n's biggest strengths is its active community. Even experienced users regularly discover new workflow patterns, integrations, and techniques through the official resources and community-created content.
If you're serious about learning n8n, make these resources part of your regular learning routine.
Official Documentation
The official documentation should be your first stop whenever you have a question about a node, credential, expression, or feature.
It includes:
- Installation guides
- Node documentation
- Authentication tutorials
- Expression references
- API documentation
- Deployment guides
Rather than memorizing every node, learn how to navigate the documentation efficiently. Experienced automation builders frequently reference it when working with unfamiliar integrations.
The Community Forum
If you encounter a problem, there's a good chance someone else has already solved it.
The official community forum contains thousands of discussions covering:
- Workflow troubleshooting
- Expression examples
- JavaScript snippets
- API integrations
- Performance optimization
- Feature requests
Searching the forum before starting from scratch can save hours of debugging.
YouTube Tutorials
Watching experienced users build workflows is one of the fastest ways to improve.
Many tutorials demonstrate:
- Real business automations
- AI workflows
- CRM integrations
- Email automation
- Database connections
- API usage
Instead of copying tutorials exactly, try understanding why each node exists and what role it plays in the overall workflow.
Build Real Projects
Tutorials are useful, but you'll learn much faster by solving your own problems.
Start by identifying repetitive tasks in your daily work.
For example:
- Saving email attachments.
- Sending recurring reports.
- Updating spreadsheets.
- Creating CRM contacts.
- Summarizing meeting notes with AI.
Projects based on real business needs are more engaging than abstract practice exercises.
Study Existing Workflows
Reading well-designed workflows is similar to reading high-quality code.
Even if you don't understand every node immediately, you'll begin recognizing common patterns that appear repeatedly.
Pay attention to:
- Node organization.
- Error handling.
- Data transformations.
- Conditional logic.
- Naming conventions.
Over time, these patterns become second nature.
Best Practices for Building Reliable Workflows
Good workflows aren't just functional—they're reliable, maintainable, and easy to understand.
Adopting good habits early will save significant time as your automations become more complex.
Build Incrementally
Resist the temptation to create a 30-node workflow on your first day.
Instead:
- Build one node.
- Test it.
- Add another node.
- Test again.
Small, incremental progress makes debugging dramatically easier.
Use Clear Node Names
Rename important nodes based on what they actually do.
Examples include:
- Read Customer Record
- Generate AI Summary
- Create Slack Notification
- Update Google Sheet
Clear naming makes large workflows much easier to maintain.
Keep Credentials Organized
If you work with multiple clients or environments, use descriptive credential names.
Examples:
- Production Gmail
- Development OpenAI
- Marketing Slack
This reduces the risk of connecting the wrong account.
Plan for Failures
External services occasionally become unavailable.
Instead of assuming every API call will succeed, prepare for situations such as:
- Network interruptions.
- Expired credentials.
- Rate limits.
- Invalid data.
- Temporary outages.
Adding retry logic or notification steps makes workflows much more resilient.
Document Important Workflows
If a workflow is critical to your business, write a brief description explaining:
- Its purpose.
- Required credentials.
- Expected inputs.
- Expected outputs.
- Any special configuration.
Documentation helps both future teammates and your future self.
Frequently Asked Questions
Do I Need to Know How to Code?
No.
Many workflows can be built entirely with drag-and-drop nodes.
Learning basic JavaScript later will expand what's possible, but it isn't required to begin using n8n effectively.
Can I Use n8n for Free?
Yes.
If you self-host n8n, you can run it on your own infrastructure without paying for a managed cloud subscription. You'll still be responsible for hosting costs and maintenance.
How Many Apps Can n8n Connect?
n8n includes hundreds of built-in integrations and can connect to many additional services through HTTP requests and APIs.
If a service provides an API, there's a good chance you can automate it with n8n.
Can n8n Use AI?
Yes.
AI has become one of n8n's strongest use cases.
Common examples include:
- Email classification.
- Content generation.
- Document extraction.
- Customer support automation.
- Meeting summaries.
- Lead qualification.
Is n8n Suitable for Businesses?
Absolutely.
Businesses use n8n to automate operations, marketing, finance, customer support, sales, internal tools, and AI-powered workflows.
The platform scales from simple personal automations to complex production systems.
What Should You Build Next?
Once you've completed your first workflow, the best way to continue learning is by building progressively more useful automations.
A practical learning path might look like this:
- Send Gmail notifications to Slack.
- Save form submissions to Google Sheets.
- Create CRM contacts automatically.
- Summarize emails using AI.
- Automate invoice processing.
- Build an AI-powered lead qualification system.
- Create content repurposing workflows.
- Automate reporting dashboards.
Each project introduces new concepts while reinforcing the fundamentals you've already learned.
Within a few weeks of consistent practice, you'll be comfortable designing workflows instead of simply following tutorials.
Where to Find Ready-to-Use Workflow Templates
While building workflows from scratch is one of the best ways to learn, there's no reason to reinvent common automations.
Production-ready templates allow you to:
- Learn faster.
- Deploy automations sooner.
- Understand best practices.
- Reduce implementation mistakes.
- Customize proven workflows instead of starting with an empty canvas.
Flowshed provides curated n8n workflow templates designed for founders, agencies, ecommerce businesses, operators, and AI-first teams.
Each workflow is designed to be imported directly into n8n, connected to your own credentials, and customized for your business.
Whether you want to automate lead enrichment, content creation, email routing, CRM updates, finance operations, or AI-powered business processes, starting from a production-ready workflow can reduce setup time dramatically.
Conclusion
n8n is much more than another automation tool. It's a platform for building systems that eliminate repetitive work, connect the software you already use, and enable workflows that would otherwise require hours of manual effort.
The concepts covered in this guide—nodes, workflows, credentials, triggers, executions, and integrations—form the foundation of almost every automation you'll build. Once you understand these fundamentals, you'll find that the same patterns appear again and again, whether you're creating a simple Gmail notification or a sophisticated AI-powered business process.
Don't feel pressured to master every feature immediately. Start with small workflows that solve real problems, test them carefully, and gradually expand your knowledge as your confidence grows. Every automation you build teaches concepts that make the next one easier.
If you're looking to accelerate your learning, Flowshed offers production-ready n8n workflow templates built for real-world business use cases. Instead of beginning with an empty canvas, you can import proven workflows, connect your own apps, and customize them to fit your operations. It's one of the fastest ways to move from learning n8n to using it to create meaningful business value.
The most important step is simply getting started. Build your first workflow, experiment with new nodes, and continue improving. Before long, you'll begin seeing automation opportunities everywhere—and you'll have the skills to turn those ideas into working systems.
Ready to automate this?
Automate this → Browse workflowsRelated posts
How to import n8n workflows in under 60 seconds
A quick guide to importing JSON workflow files into your n8n instance.
How to Build an Automated Lead Enrichment Pipeline with n8n
Build a fully automated lead enrichment pipeline in n8n — from form submission to scored, CRM-ready lead in under 60 seconds.
How to Automatically Categorize and Route Your Gmail with AI Using n8n
A complete guide to building an AI-powered Gmail categorizer in n8n — classify, label, and route emails automatically using GPT-4o.